What is Effective Resolution? Understanding Resolution and Pixel Density
This video is available with Free For All.
Running Time: 10 minutes
My name is John Ross from the Art of Retouching Studio. In this video, I’ll introduce you to three important topics that are essential for working with digital images in Photoshop, and these are pixels, image size and image resolution.
Having a solid understanding of how they are related to each other is essential for getting the best results when resizing images, both for print and for the web. Let’s take a look at Image Resolution, and how you can make it work for you.
Different Kinds of Resolution

Simply put, resolution is the amount of detail that’s available for an image. One million pixels equals 1mp. So, a 36mp camera can provide substantially more detail than a 12mp camera. As long as your image is sharp and in focus, then higher resolution equals more detail. But, the confusing part is that there are two different kinds of resolution.
The first kind of Resolution refers to the Pixel Count, which is the actual number of pixels that create your photo. In order to calculate this resolution, you just use the same formula you would use for the area of any rectangle; multiply the length by the height. For example, if you have a photo that has 6,000/px on the horizontal side, and 4,000/px on the vertical size, this gives you a total of 24 million pixels. As I just said, this would be 24mp.
The other kind of resolution is about how you actually distribute the total amount of pixels that you have, which is referred to as Pixel Density. This is also commonly known as PPI, or Pixels Per Inch.
What do I mean by “Distribute”? Well, your Phone’s camera will likely have a default of 72/ppi. A DSLR Camera that goes through Lightroom will have a default value of 240/ppi. However, the industry standard for printing is 300/ppi. On the surface, this looks like we have 3 completely different values. However, if they are all based on 24mp, then they are all the same. They just happen to be arranged differently.
Think of pixels as water. 8/oz of water is always 8/oz of water. It doesn’t matter if you put it into an 8/oz cup, a 16/oz cup, or spill it all over the floor. So, if a 24mp image equals 8/oz of water, then you can understand nothing changes, no matter what you do with it.
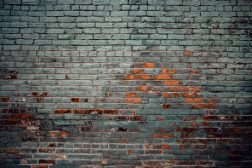
Think of Pixels as Bricks

If you have a patio paved with bricks, its size is determined by how many bricks you have, right? And if you want to measure that patio, one way would be to just count the bricks. A patio that is 20 bricks tall and 30 bricks long consists of 600 bricks total. It does not matter if it’s wide, tall, or in a straight line. 600 bricks are always 600 bricks. What matters is how you arrange them.
600 bricks will always be larger than a patio with 300 bricks, and smaller than a patio with 1,000 bricks. Simple.
Switch those bricks to pixels, and now you’re beginning to see how the number of pixels in an image file, or available on a DSLR sensor, directly determines how big the image size will be.
The greater the number of pixels in an image, the denser the picture information, and therefore the higher the resolution. Higher resolution provides more detail within your image, and allows for larger printouts with smooth, continuous tone and color accuracy.
When it comes to understanding digital image resolution and how it pertains to image size, all that matters are the number of pixels contained in the file. It’s not about DPI, PPI or how many inches Photoshop says your photo is.
What matters is the Area Resolution of the file, which is measured in pixels. When people talk about the Resolution of an image file, what they’re really talking about is Area Resolution, because this dictates how large the file really is.
Effective Resolution: Crap! Now what’s this?!?

A key concept you need to understand is Effective Resolution. This is simply the final resolution of any picture at the actual size that it is placed within the document. This is really quite simple. Let’s say you take a picture with a full background, but then later most of the background is cropped out.
This is why you may have heard of 300/dpi being an industry standard. If half is cropped out, it can still be printed at 150/lpi (lines per inch), which is the front cover of a magazine. I have another video that deep dives into the relationship between Dots Per Inch, Pixels Per Inch, and Lines Per Inch. You can find a link for that in the description below.
Now, as I just said, your image may need to be cut in half. This is why photographers want a high MegaPixel Camera, it allows for extreme cropping. This is because of the high number of pixels to start with. If your subject is noticeably small in the frame, you may still be able to crop in, and get the shot.
For example, many years ago I knew a photographer who had gotten a brand new D800 Nikon camera, which is 36mp. He felt that the size of these images was just too large (back then, it was). So inside the camera he scaled it down to 24mp.
He had taken the photograph of the model from the top of his head down to his knees, then he gave the image to me. He told me he wanted it cropped at the waist. However, when I finished retouching, he told me that the image was too small and he needed it larger.
So, if you start doing the math, the 36mp went down to 24mp. I then cut the image in half, which burned it down to 12mp. When he said it was too small, I needed to have Photoshop make-up pixels to bring it back to 18/mp. This never would’ve happened if he had shot it at the full 36mp size to begin with.
Enlarging Images

This introduces another Resolution issue, which is the overly enlarged image. This occurs when someone tries to take a really small image, and enlarge it to fit their design. While it is true that you can enlarge an image safely, going beyond a certain size will result in a degraded or even a “pixelated” (or blocky) looking image.
It is generally recommended that you do not enlarge pictures more than 150% of the original size (at 300 PPI). Pictures enlarged beyond 125% will show some degradation, and enlarging an image beyond 200% can result in the actual pixels becoming visible.
When you ask Photoshop to blow up images, it has to take similar pixels and create new pixels between them. This is called Interpolation. For example, if you have a red pixel and a blue pixel, it’s going to put a mixture of the two pixels in between, which would be a purple pixel.
When Photoshop has to create new pixels or remove pixels it’s basically just making things up as it goes along. And ultimately, the more work you do to the final image, the more damage that has to be done to it. But if you’re always working with the highest quality images that you possibly can from the very beginning, you can get away with a lot more by the time you’re done.
One last big topic. Think back to the old video games of the 70s or 80s where all the little characters were very jagged. This is called Aliasing. Aliasing is the jagged, or saw-toothed appearance of curved or diagonal lines on a low-resolution display.
Back then, the low resolution characters looked fine when they were on low resolution displays. But on today’s High Definition displays, they need to be blown up, and they look bad because they’re just blocks of solid color.
When blowing up images, Photoshop is going to compensate for that Aliasing. It will use what’s called Anti-Aliasing, which means it’s going to soften pixels around other pixels in order to give it a smoother transition. The problem is it ultimately leads to softer looking images.
Think of Pixels as Pizza

Here’s a silly story, but this is the best way I ever had resolution explained to me. Imagine you work in a kitchen, and you just made a pizza pie. It’s a nice big round pizza, it has all the ingredients on top of it, and you haven’t had lunch yet. So you take away a slice of pizza, and you eat it. Well, we can’t let everyone else know that you did that. Right?
So you kind of flatten out and mush it together so that you fill in that missing gap. No one’s really going to notice because you had enough information to begin with, so that it still looks good.
But you’re still hungry, so you take a second slice. Well, now you’ve technically taken two slices out of this pizza. So once again, you mush it, and you push it back together.
To do this, you had to make it a little smaller than intended, and it has to be a thin crust because you’ve just eaten two slices. But it’s still enough that you can technically get away with it, and no one’s really going to question it.
But you’re still hungry and you take another slice. Now you have a problem. You take that pizza and mush it together, and you try to make it smaller with the thinnest crust possible. But, all the ingredients fall through the crust because it’s so thin.
So, if you were to compare this to resolution, if you start with the largest size image your camera can produce, you can get away with a lot. As long as the image was sharp to begin with, you can scale the image bigger or smaller because you had all of the original information to start with.
However, if you keep cropping your image, blowing it up, shrinking it, and doing other damage, it will eventually fall apart. Just as bad, saving it as a JPG more than once, and you will have a real mess on your hands.
When Resolution is Irrelevant

So, when IS Resolution Irrelevant? This happens at the tipping point when your Effective Resolution is significantly lower than the Actual Resolution. If you have a 24mp camera, this should cover most of your needs, because that’s about 13/in by 20/in. So If you have 36mp, then all the better. You have starting information to crop down, blow up, and do whatever you want.
But after that, 50mp, 75mp, or even 100mp, it’s complete overkill. I once started to work on a 100mp image, and my first 2 steps created a 2gb file. I had not even started working yet, I barely prepped it. I needed to come up with a completely different workflow.
While the obvious answer is to simply work on images at their full camera size, this isn’t always the case, or even practical. I once did a composite that took two 36mp images and put them together, plus I added to the top, bottom and sides.
This thing was huge, and because it was a composite, I was adding layer after layer. I was working in 16-bit depth, and this file was so large, I had to start using something called Linked Smart Objects. Working on it was painfully slow, and the computer wanted to die.
In the end, it printed at 10/in tall. To this day, I still wonder why I went through all that. I should have just worked on it as a single 36mp, and scaled everything else DOWN, instead of everything else UP. I should have just kept in mind what the Effective Resolution was going to be.
Resolution is an incredibly complicated topic, but I hope this video helped explain it for you. If you would like to see how it works in the real world, I have a side-car video I plan on making. When it’s ready, I will add it to the description below.
Resolution in the Real World

Let’s do a practice exercise to see how Photoshop manipulates files with the Image Size dialog box. Using Photoshop, let’s start with a very basic file. I’m going to create a new image, and make the width 100px by a height of 100px, with a “Resolution” of 300/ppi. For now, just click okay, and it’s going to create a blank white image for us.
Next, go to Image – Image Size. Within this dialog box, we can play around with Resolution. Currently, this says our Image Dimensions are 100/px by 100/px. It’s Width is .33/in by a Height of .33/in at a resolution of 300/ppi.
And below that, we have a checkbox which says Resample. To get started, I’m going to uncheck this Resample checkbox. With this setup, this dialog box becomes a scale, where everything needs to be balanced.
If I was to change this Resolution of 300/ppi to 150/ppi, watch what happens. By cutting the PPI in half, notice that the pixels themselves haven’t changed. They are still 100/px by 100/px. However, the inches have doubled to .667/in. If I was to cut the Resolution in half again, down to 75, once again it’s made our inch size larger at 1.33/in. But again, it hasn’t changed our actual pixels at all. Nothing has physically changed in this image.
The bottom line of it is this, if the inches go up, then the Resolution goes down. If the Resolution goes up, then the Inches go down. But at the end of the day, we haven’t actually done anything to this image. It’s still the same 100/ppi that we started with. It doesn’t matter I make the numbers.
I’m going to change these values back to where we started, .33 inches by .33 inches at a resolution of 300ppi. Now, lets turn on the Resample Checkbox. We’ve just given Photoshop permission to add or remove pixels to the image.
If I change the resolution to 600, the inches haven’t changed. It still says .33/in, but the pixels have doubled in size to 200/px by 200/px. That’s because we told Photoshop to Resample, or scale this image, based off of the new information. And the new information that we just gave, was make it twice the size that it was originally because we went from 300/ppi to 600/ppi.
If I was to go back to 300/ppi, you can see this goes back to 100/px. But if I cut the Resolution in half to 150/ppi, the actual pixels have been cut in half down to 50/px.
By making the resolution larger, we’re making the image larger by adding more pixels. By making the Resolution lower, Photoshop throws away pixels, and this makes the image smaller.
This gets confusing though, because we are just changing the number of pixels, not the inches. But just like then first example with Resample unchecked, Photoshop is being used like a calculator. If we leave Resolution fixed at 300/ppi, then change the Inches instead, we are technically doing the same thing, which is adding (or removing) pixels.
In the last example, we raised Resolution up to 600/ppi, which brought the Pixel Dimension up to 200/px but it didn’t change inches. Because this is all a scale, we can leave the Resolution at 300/ppi, and change the inches to .66/in. Now you can see the pixels doubled to 200/px.
All you need to know is that Pixels are for Screen Display, and the Width and Height are for Printing. As long as you have enough pixels for screen size you want, you’re good. For printing, as long as the Width and Height meet the size you need, and Resolution is “at least” 200/ppi, with 300/ppi being best, then your good.
Also when making YouTube Thumbnails, using a 24mp camera to take a selfie is fine, just know that you’re going to be reducing it to like 10%. Therefore, the extra 90% of information was irrelevant.
…
Understanding effective resolution is like mastering the ABCs of digital image editing. Imagine pixels as the building blocks of your image, much like bricks in a wall. The more pixels, the more details in your picture. But it’s not just about the sheer number; it’s also about how you arrange them.
Think of pixels as ingredients on a pizza. Starting with a big pizza, you can take a few slices without anyone noticing. But if you keep taking slices, eventually, the pizza falls apart. Similarly, if you edit an image too much—cropping, enlarging, or saving it multiple times—it can lose quality.
Effective resolution is your image’s final quality at its actual size in a document. It’s crucial when resizing or cropping. Starting with a high-resolution image gives you more flexibility. It’s like having a big pizza; you can adjust without losing quality.
Remember, resolution matters less when viewing on screens but is crucial for printing. So, keep your pixels (ingredients) in check, and you’ll create digital masterpieces with ease!
Suggested Next Video: 8-Bit vs. 16-Bit | Bit Depth | What is Tonal Range?

